This post may contain affiliate links. Read the full disclosure here.
Fall is absolutely my favorite season for crafting with my three boys! There’s something magical about bringing those gorgeous autumn colors indoors, and when the kids make their own decorations, they’re so much more excited to display them in their rooms.
Plus, it keeps them busy on those chilly afternoons when we’re stuck inside!
These fall decor crafts for kids are perfect for all ages and skill levels, and I promise they won’t leave you drowning in glitter or cleaning paint off the ceiling for weeks. Each project creates something beautiful that your little ones will be proud to show off in their personal space, and you’ll love how festive their rooms look all season long!
Painted Pinecone Decorations
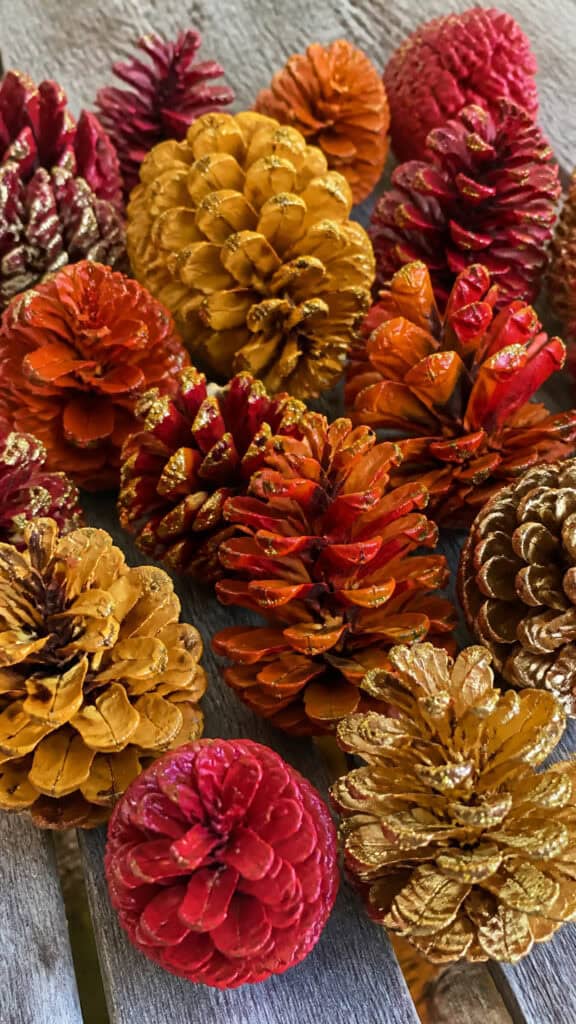
Pinecones are basically nature’s gift to crafty moms everywhere! My boys and I collect them on our walks around the neighborhood, and they’re absolutely free. Once you’ve gathered a nice collection, these little treasures can be transformed into stunning fall decorations that look amazing on shelves, windowsills, or hanging from doorknobs.
Start by letting your kids paint the pinecones in classic fall colors like orange, red, yellow, burgundy, and gold. I usually set up a painting station with newspaper or an old tablecloth, and let them go wild with acrylic paint. The beauty of this project is that there’s really no wrong way to do it! Some of my boys like to paint every single scale, while others prefer a more rustic look with just the tips painted.
Once the paint dries completely (usually takes about an hour), you can add extra sparkle with a light coating of Mod Podge and some glitter. I know I said no glitter earlier, but this method actually seals it in pretty well! For displaying, you can hot glue a piece of twine to the top to create ornaments, or simply arrange them in a bowl or basket. My middle son loves lining his up on his bookshelf like little autumn soldiers!
These painted pinecone decorations are seriously one of the easiest fall decor crafts for kids, and they last for years if stored properly. We still have some from two years ago that we bring out every season!
Paper Plate Scarecrow Faces
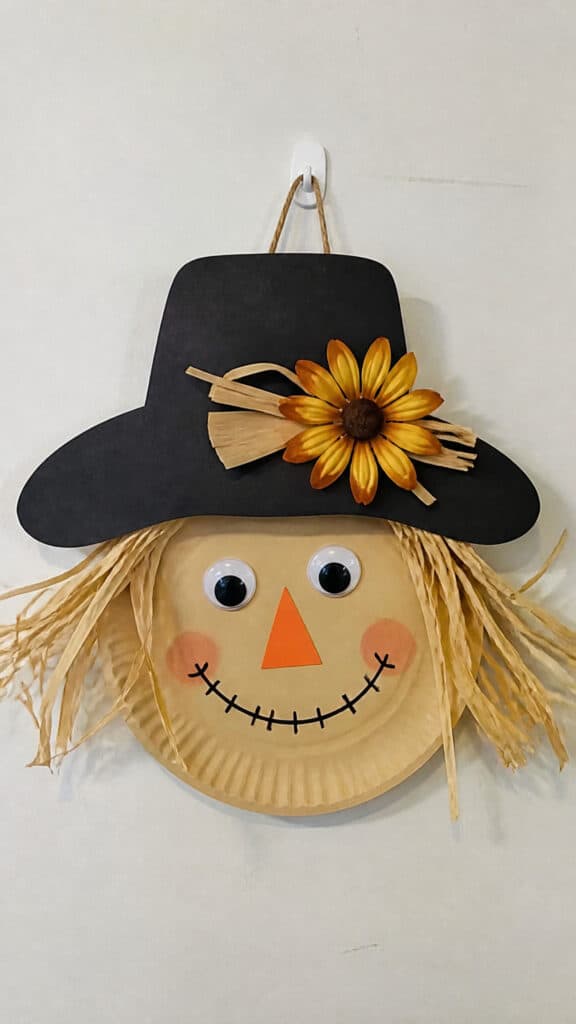
Paper plate crafts are a staple in our house because they’re cheap, easy, and the supplies are always on hand! These adorable scarecrow faces are perfect for hanging on bedroom doors or walls, and each one turns out completely unique based on your child’s creativity.
You’ll need paper plates (obviously!), construction paper in fall colors, googly eyes, glue sticks, and markers. I also like to have raffia or yarn on hand for the hair, which really makes these scarecrows come to life. Start by having your kids color or paint the paper plate to create the scarecrow’s face – we usually go with a peachy or tan color, but honestly, anything works!
Once the base is dry, it’s time for the fun part! Cut out triangles from orange construction paper for the nose, and let your kids draw on a stitched mouth with a black marker. Those googly eyes are essential – they add so much personality! For the hat, cut a rectangle and a circle from black construction paper, and glue them together to form a classic scarecrow hat shape.
The finishing touch is the hair, and this is where my boys get really creative. We cut pieces of raffia or yarn and glue them around the edges of the plate, sticking out from under the hat. Some of my kids like wild, crazy hair while others prefer a neater look. Add some patches cut from fabric scraps or construction paper, and you’ve got yourself an adorable fall friend!
These paper plate scarecrows are fantastic fall decor crafts for kids because they’re simple enough for even my youngest to participate, but fun enough that my oldest doesn’t think it’s babyish. Win-win!
Handprint Fall Tree Canvas
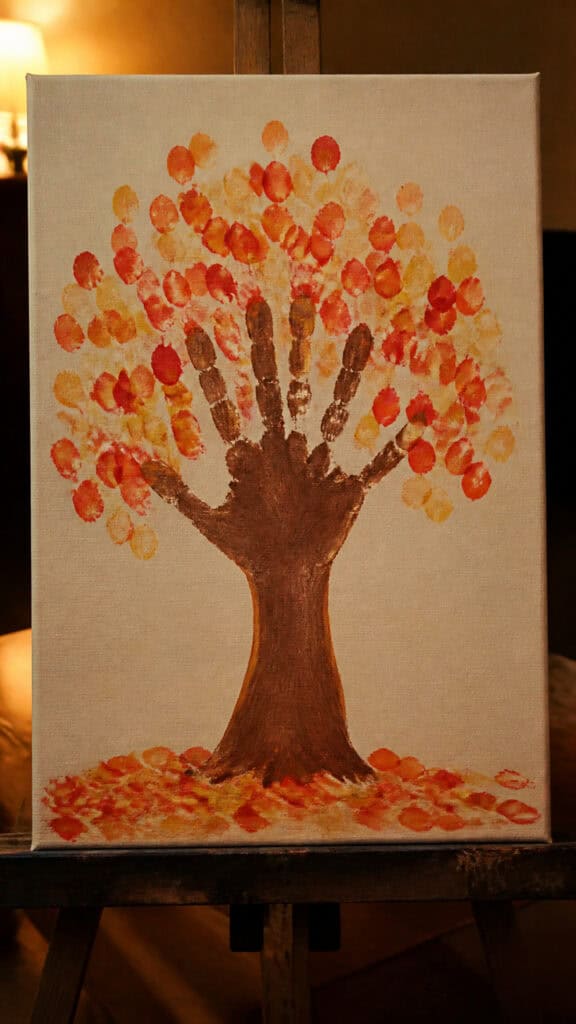
Handprint crafts hold such a special place in my heart because they capture how little our babies’ hands are at this very moment! This fall tree project creates a keepsake that your kids will love displaying now, and you’ll treasure forever. I’m not crying, you’re crying!
Grab a canvas from the dollar store or craft shop – I usually get 8×10 or 11×14 sizes, depending on your budget and wall space. You’ll also need brown and fall-colored acrylic paints (red, orange, yellow, and maybe some burgundy). Start by painting your child’s hand and forearm brown to create the tree trunk and branches. Press it firmly onto the canvas, and voila – instant tree!
Once the brown paint is completely dry, it’s time to add the leaves! This is where things get messy and fun. Have your kids dip their fingertips into the fall colors and press them all around the branches to create leaves. I like to mix the colors randomly for a really authentic autumn look. You can also add some falling leaves by making fingerprints at the bottom of the canvas.
For an extra special touch, use a thin paintbrush or marker to write your child’s name and the year at the bottom of the canvas. Trust me, you’ll be so glad you dated these! My boys love seeing how much their handprints have grown from year to year.
These canvases look absolutely adorable propped up on dressers or hanging on bedroom walls. They’re definitely one of my favorite fall decor crafts for kids because they’re both decorative and sentimental!
Leaf Garland from Real or Paper Leaves
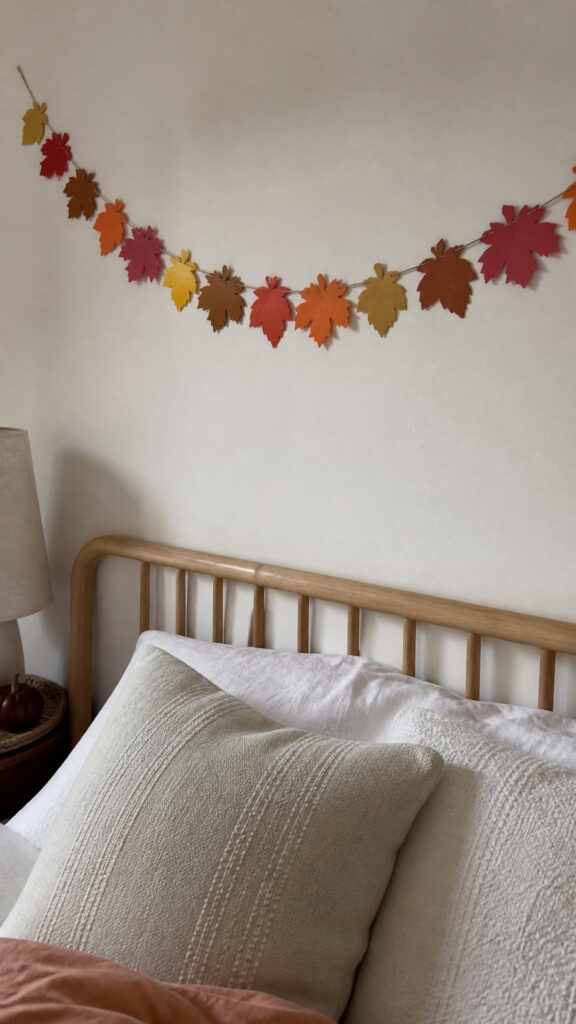
Garlands are such an easy way to add fall flair to any room, and making them is actually way easier than you’d think! You can use real leaves that you’ve collected and pressed, or go the paper route if you want something that lasts longer. Both options create beautiful fall decor crafts for kids that they’ll be excited to string up in their rooms!
If you’re using real leaves, head outside with your crew and collect the prettiest ones you can find. Look for leaves in various colors and sizes for the most interesting garland. Once you’re home, press them between heavy books for a few days to flatten them out. Then, use a hole punch to make holes at the top of each leaf, and thread them onto twine or ribbon. So simple!
For paper leaves, trace leaf shapes onto construction paper or cardstock in fall colors. My boys love using cookie cutters as templates – we have a maple leaf one that gets tons of use! Cut out the leaves and let your kids decorate them however they want. We’ve done everything from drawing veins with markers to adding glitter glue details to painting them with watercolors.
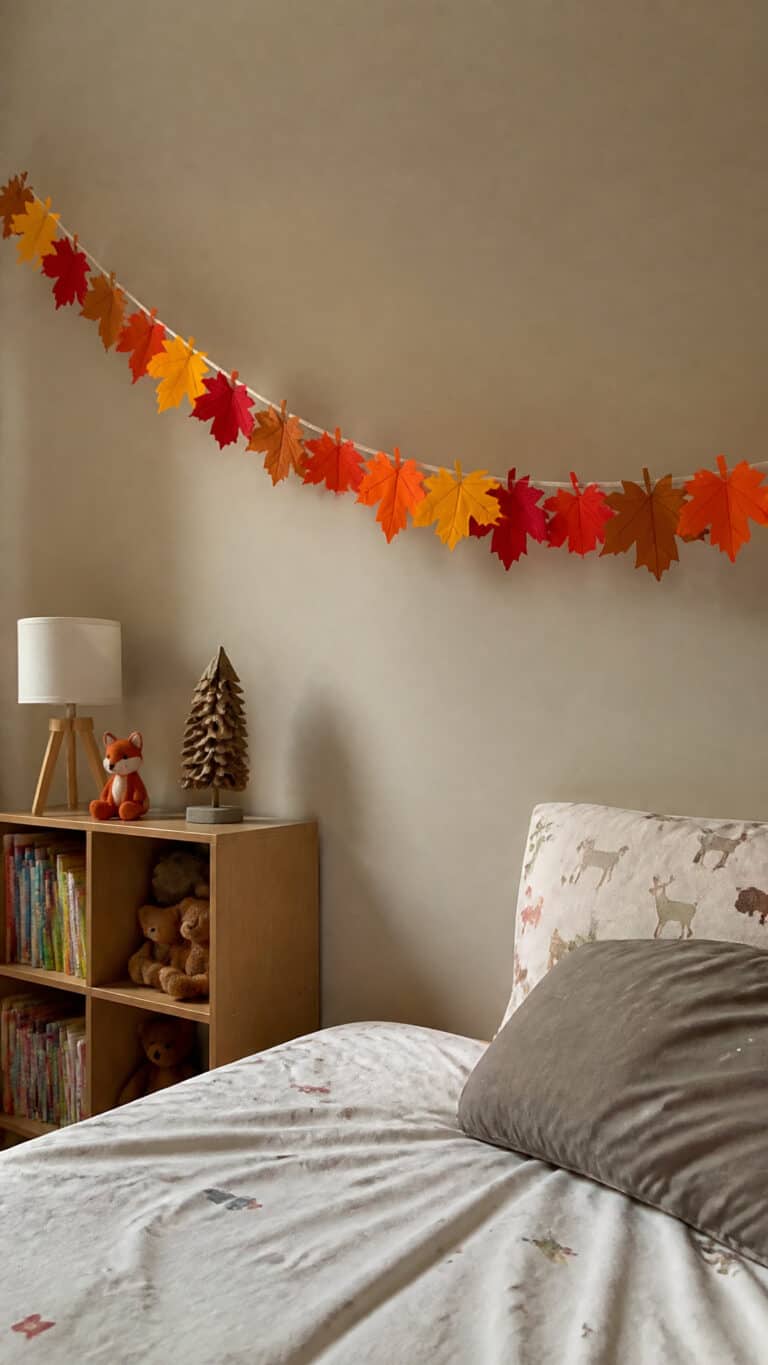
Once all your leaves are ready, punch holes in them and string them onto your twine or ribbon, spacing them however you like. I usually leave about 2-3 inches between each leaf. These garlands look amazing draped over headboards, hung across windows, or tacked along a bookshelf.
My middle son has had his leaf garland hanging in his room for two years now (the paper version!), and it still looks great. That’s the kind of longevity I can get behind!
Mason Jar Lanterns with Fall Themes
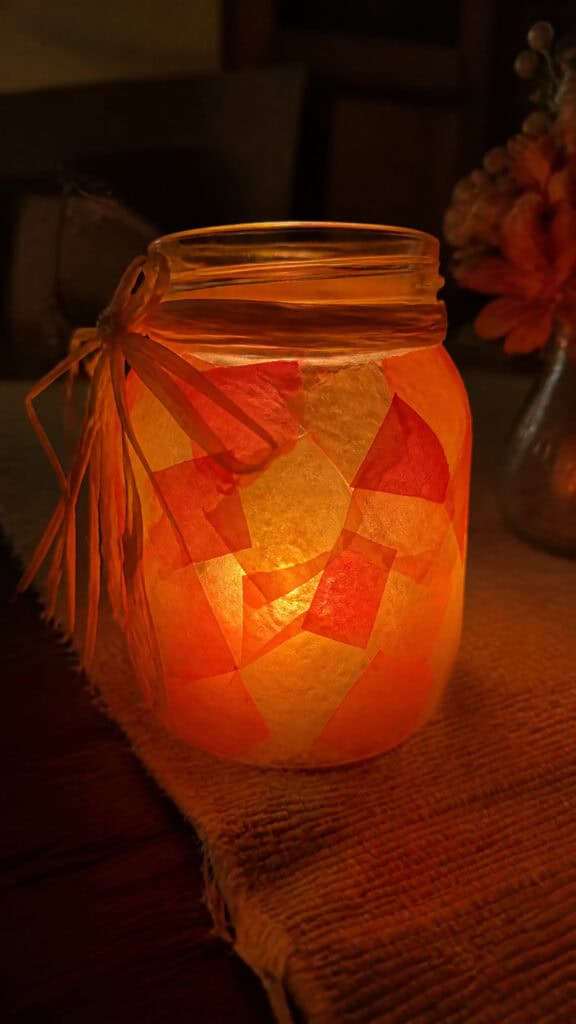
Mason jars are another one of those magical crafting supplies that work for literally everything! These fall-themed lanterns create the coziest glow in kids’ rooms, and they’re surprisingly easy to make. Plus, they look way more expensive than they actually are!
Start with clean mason jars in whatever size you have on hand. Pint-sized jars work perfectly for kids’ rooms. You’ll need Mod Podge, tissue paper in fall colors, and battery-operated tea lights (please, please use battery-operated ones – safety first, mama!). Cut or tear the tissue paper into small pieces – my boys actually love the tearing part because it’s impossible to mess up!
Have your kids brush Mod Podge all over the outside of the jar, then stick on the tissue paper pieces in a random pattern. Overlap the colors to create really pretty blended effects. Once the entire jar is covered, brush another layer of Mod Podge over the top to seal everything. This creates a beautiful stained-glass effect when the light shines through!
For extra fall flair, you can tie raffia or ribbon around the neck of the jar, or hot glue on some small artificial leaves or acorns. Once everything is dry, pop a battery-operated tea light inside, and watch your kids’ faces light up when they see how pretty it glows!
These lanterns are perfect for nightlights or just adding ambiance to a room. They’re definitely one of those fall decor crafts for kids that looks impressive but is actually super doable, even with my wild crew!
Popsicle Stick Pumpkin Patch Signs
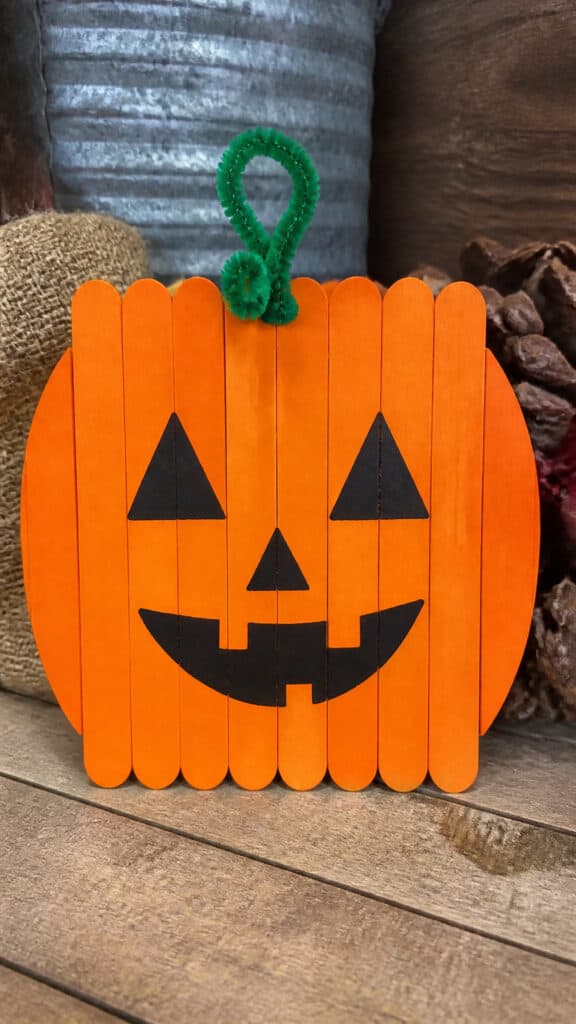
Popsicle sticks are basically the building blocks of kid crafts, and these little pumpkin patch signs are absolutely adorable! They’re perfect for propping up on a dresser or shelf, and they scream fall in the best way possible.
You’ll need about 8-10 popsicle sticks per pumpkin, orange paint, green paint or pipe cleaners, glue, and a piece of cardboard for backing. Start by laying out your popsicle sticks side by side and gluing them to a piece of cardboard cut to size. This keeps everything together and makes the finished product sturdier.
Once the glue is dry, let your kids paint the popsicle sticks orange. We usually need two coats to get good coverage, which is fine because it gives us an excuse to spread this craft over two days! After the orange paint is completely dry, you can add details like a jack-o’-lantern face with black paint or markers. My boys love making silly faces with goofy smiles and wonky eyes!
For the stem, you can either paint the top popsicle stick green before attaching it, or twist a green pipe cleaner and glue it to the top. The pipe cleaner method is actually easier and looks really cute! Some families like to add their family name or a fun fall saying like ‘Happy Fall Y’all’ or ‘Pumpkin Patch,’ but honestly, they’re adorable just as plain pumpkins too.
These little signs are so versatile and can be customized in endless ways. They’re great fall decor crafts for kids because each child can make their pumpkin totally unique!
Felt Acorn Ornaments
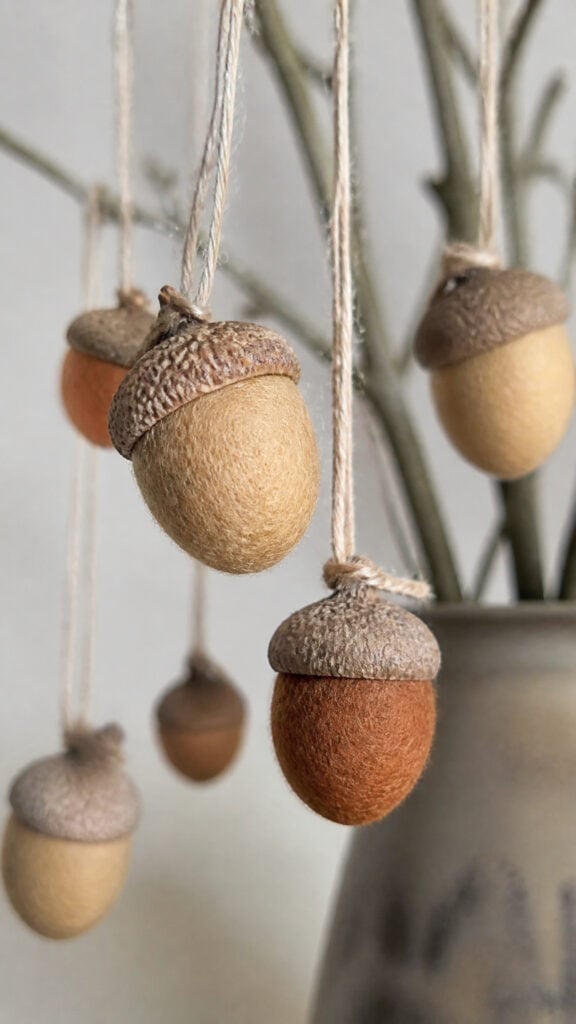
Okay, I’ll admit that felt crafts intimidated me at first because I’m not exactly a sewing expert! But these no-sew felt acorns are so easy that even I can handle them, and they turn out ridiculously cute. My boys love hanging them from their curtain rods or doorknobs!
You’ll need felt in brown and tan colors, acorn caps (you can collect these outside or buy them at craft stores), hot glue, and twine or embroidery floss for hanging. Cut oval shapes from the tan felt – these will be the acorn bodies. They don’t have to be perfect! In fact, the slightly wonky ones have the most character.
Next, hot glue the real acorn caps to the top of each felt oval. I handle the hot glue gun while my kids arrange the pieces and tell me where to glue. Safety first, but they still feel totally involved in the process! Once the cap is secure, cut a small piece of twine and glue it to the top to create a loop for hanging.
If you want to get fancy, you can add details with fabric markers or even sew on little faces with embroidery floss. My youngest insisted on making his acorns into little characters with smiley faces, and honestly, they’re the cutest things ever! You can also experiment with different colors of felt – we’ve done orange and red ones that look like fancy autumn acorns.
These felt acorns are perfect for hanging in clusters or spreading around the room on different surfaces. They’re wonderful fall decor crafts for kids that add a subtle, natural touch to any space!
Creating Fall Memories One Craft at a Time
There you have it – a whole collection of fall decor crafts for kids that will transform their rooms into cozy autumn wonderlands! The best part about these projects isn’t just the adorable decorations (though those are pretty great), it’s the memories you’re making together. My boys might not remember every single craft we’ve done, but they’ll remember the time we spent together, the laughter, and the pride they felt displaying their creations!
So grab your supplies, embrace the mess (because there will be mess, let’s be real), and dive into these fun fall projects with your kiddos! Their rooms will look absolutely festive, and you’ll have handmade treasures to cherish for years to come. Happy crafting, mama!